

How To Bake Using The Cake Pop Mold
How was your weekend? We spent most of it jubilant my friend's altogether. I made a whole mess of treats including chocolate zucchini cake (every bit cupcakes), these salted caramel dark chocolate cookies, and these peanut butter K&M cookies too– information technology's been way too long since I made a batch of those in particular! The birthday girl loves chocolate and peanut butter and caramel so these iii were a no brainer.
There's no batter time (become it? batter?) than a happy occasion to indulge in your favorite treats whether that's a birthday, shower, hymeneals, you name it. My mom and sisters threw my baby shower terminal month and one of the treats they surprised me with was a HUGE display of cake pops. I honey cake pops, simply inappreciably ever have the time to make them. Though I did whip up a batch for both of my sisters' conjugal showers in the past few years.
Run into? Special occasions call for super special treats.
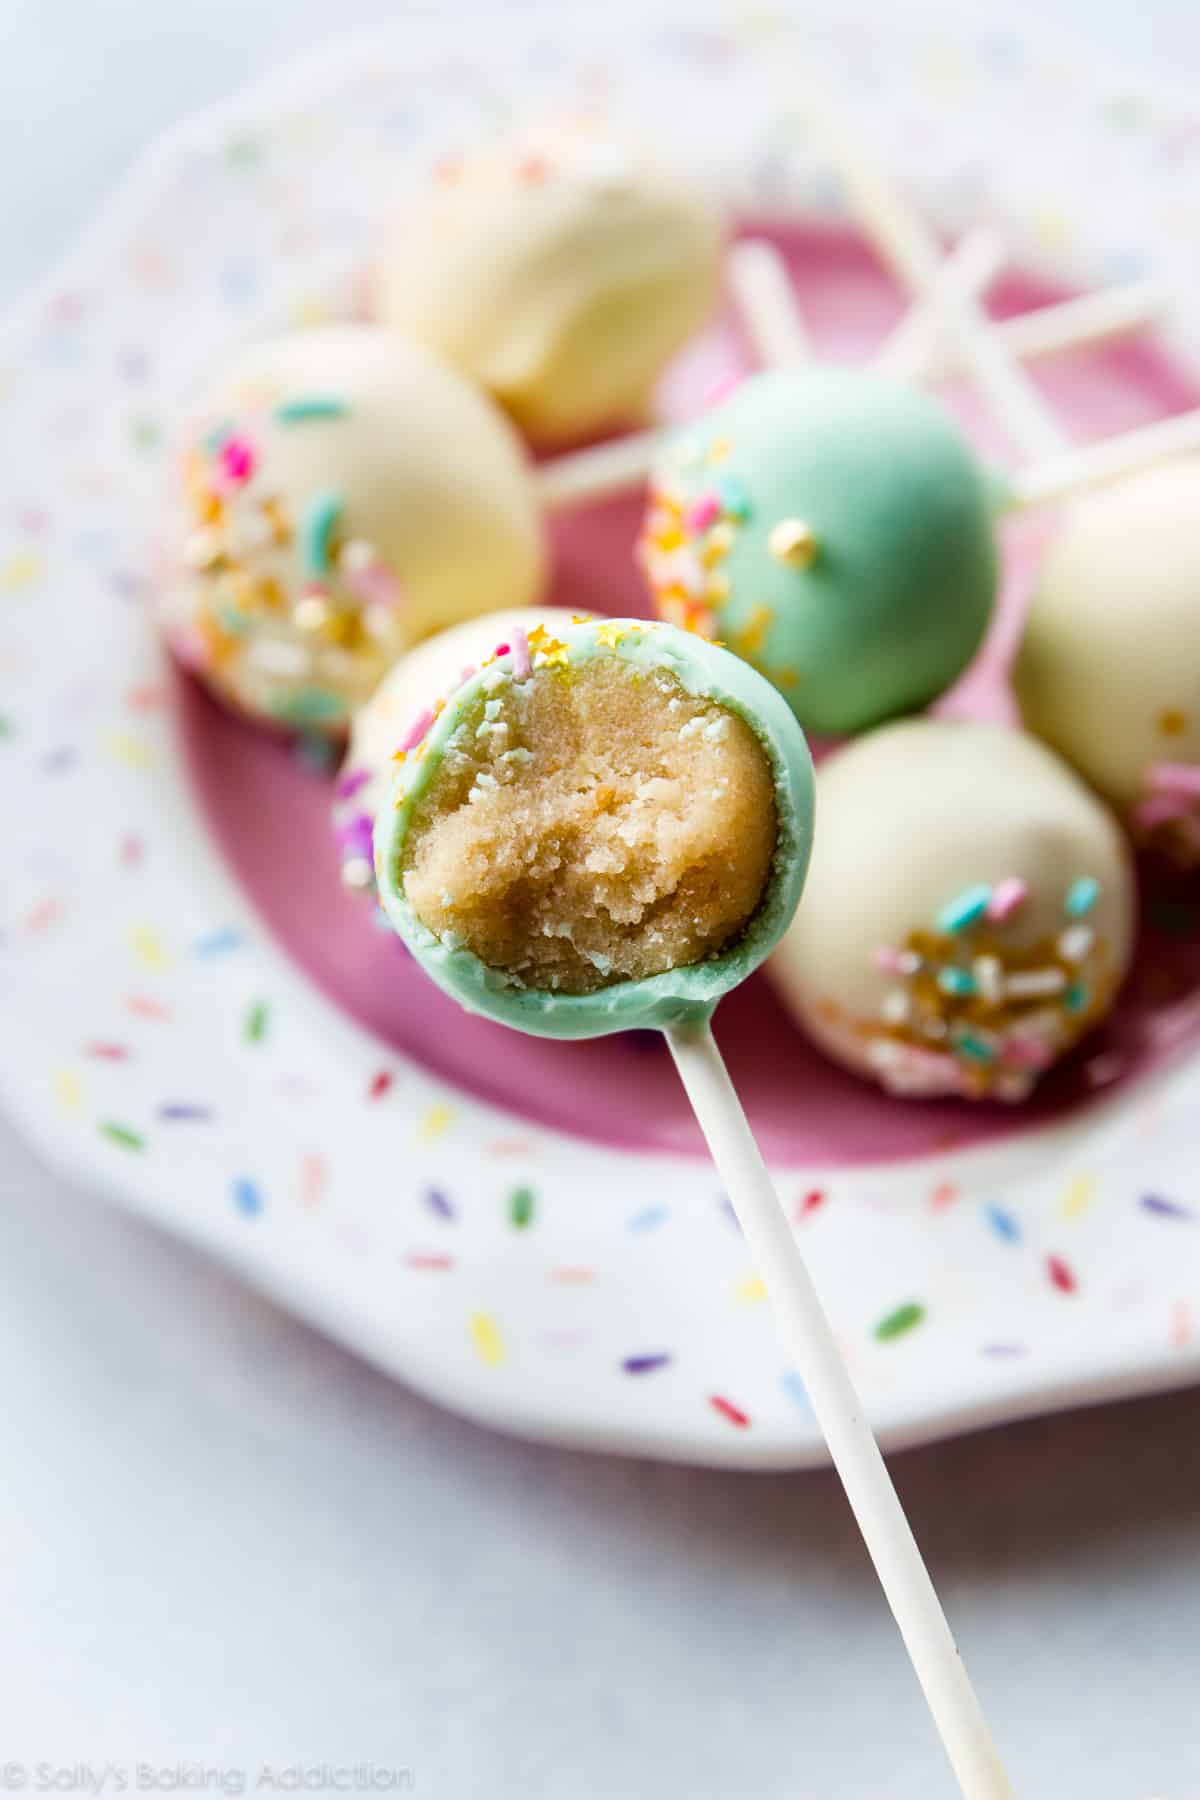
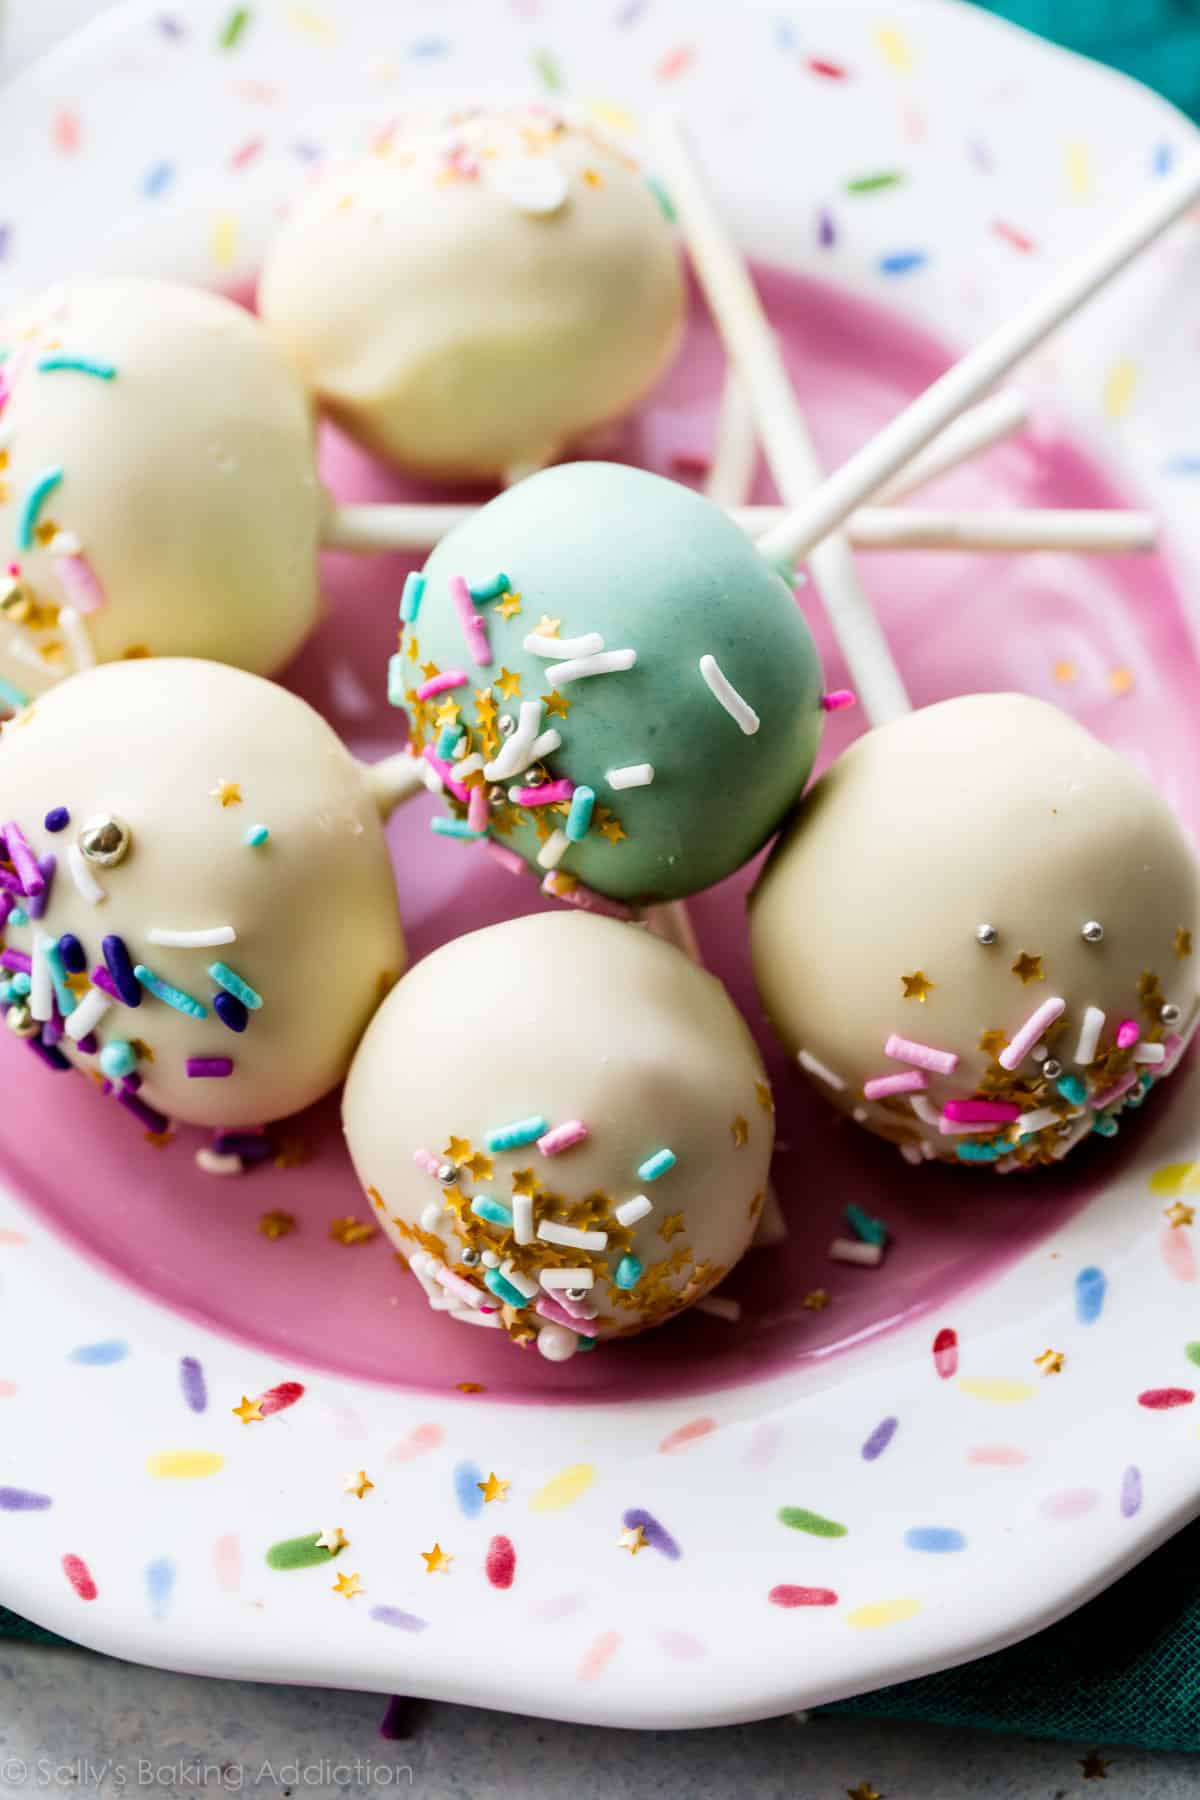
The deviation between these block pops and others you may have tried is that these are 100% homemade. There's no box cake mix or canned frosting, which results in a totally unique block pop feel. You tin can really TASTE the bootleg. The dear, the passion, and the care that goes into creating each adorable pop.
And then anyhow! I first began making homemade cake pops when I wroteSally'due south Processed Habit. In fact, this recipe is published in the book! I want to share information technology on the blog too because I've gotten lots of questions about making from-scratch cake pops.
Today we'll go over all my tips, tricks, and secrets to crafting the peeeeerfect pop as well equally the bootleg vanilla cake and vanilla buttercream used inside. There's lots of basis to comprehend so let's pop correct to it. (Tin't terminate with my nerdiness right now.)

Since nosotros're leaving the box block mix and canned frosting on the shop shelves, we'll need to have a piffling extra time to prep both from scratch. I always brand the cake the night before, and then finish the cake pops the next day. Here'due south the general process:
- Make bootleg cake.
- Make homemade frosting.
- Crumble cake into homemade frosting.
- Mix.
- Roll into assurance.
- Dip.
- Swallow!
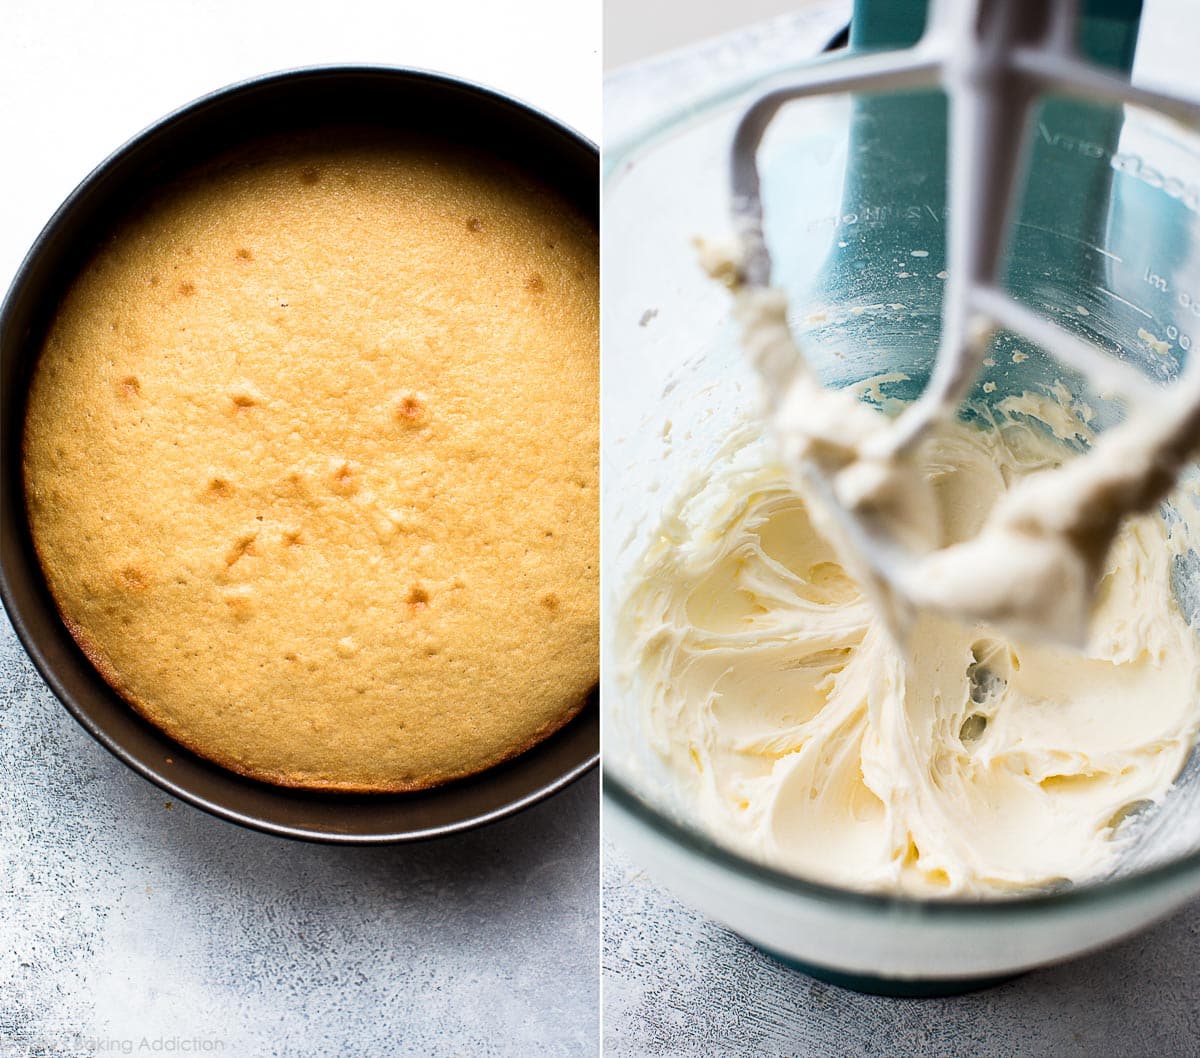
Super basic recipes for both the vanilla cake and frosting, but I practise encourage you to use the correct size pan for the block. This cake is besides large for a typical 9-inch cake pan. You'll need to apply a ix-inch springform pan since it rises quite high. Or y'all tin can employ an xi×7 pan instead. A 10-inch springform pan would piece of work besides.
Cake ingredients are straightforward. The basic crew like flour, butter, sugar, vanilla, milk. Same goes with the vanilla frosting: butter, confectioners' sugar, vanilla, milk (or cream). The difference between this and what you get out of a box is the taste. You can totally tell these block pops are special and it's because you started with from-scratch components. WORTH Information technology!
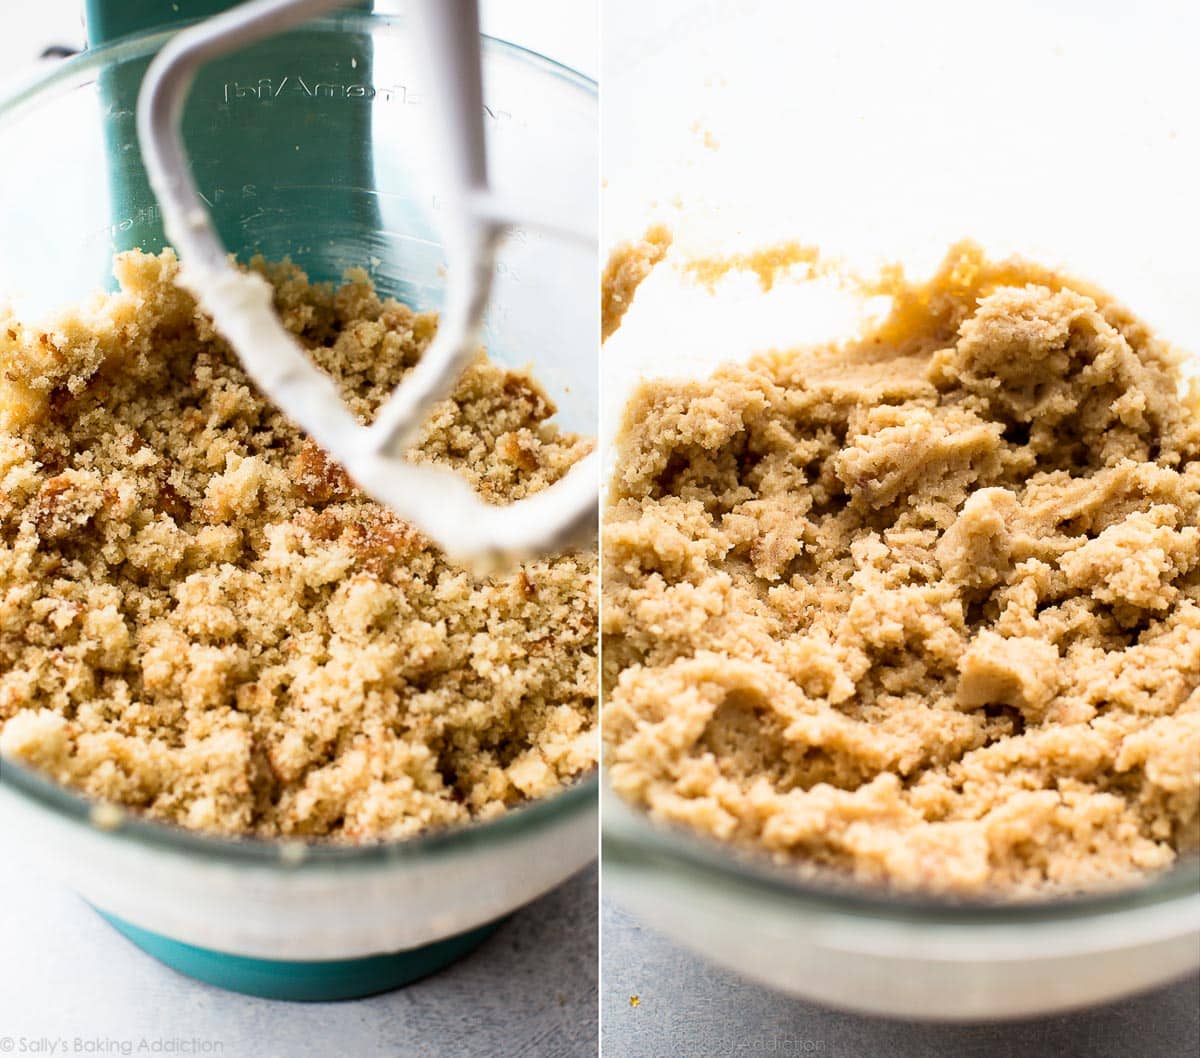
Now information technology'due south time to crumble the block upwards and mix with your frosting.
(Aging the cake into the frosting sounds super weird when you call back about information technology and that's exactly what block pops are– super weird when you think well-nigh it. It'south cake and frosting mixed together to form a truffle-similar ball. Pop a stick in it and dunk into blanket. Yeah, it'south weirdly succulent and awesome and you need to embrace information technology.)
Left photograph: cake crumbled into basin of frosting.↓
Right photo: the two mixed together.↓
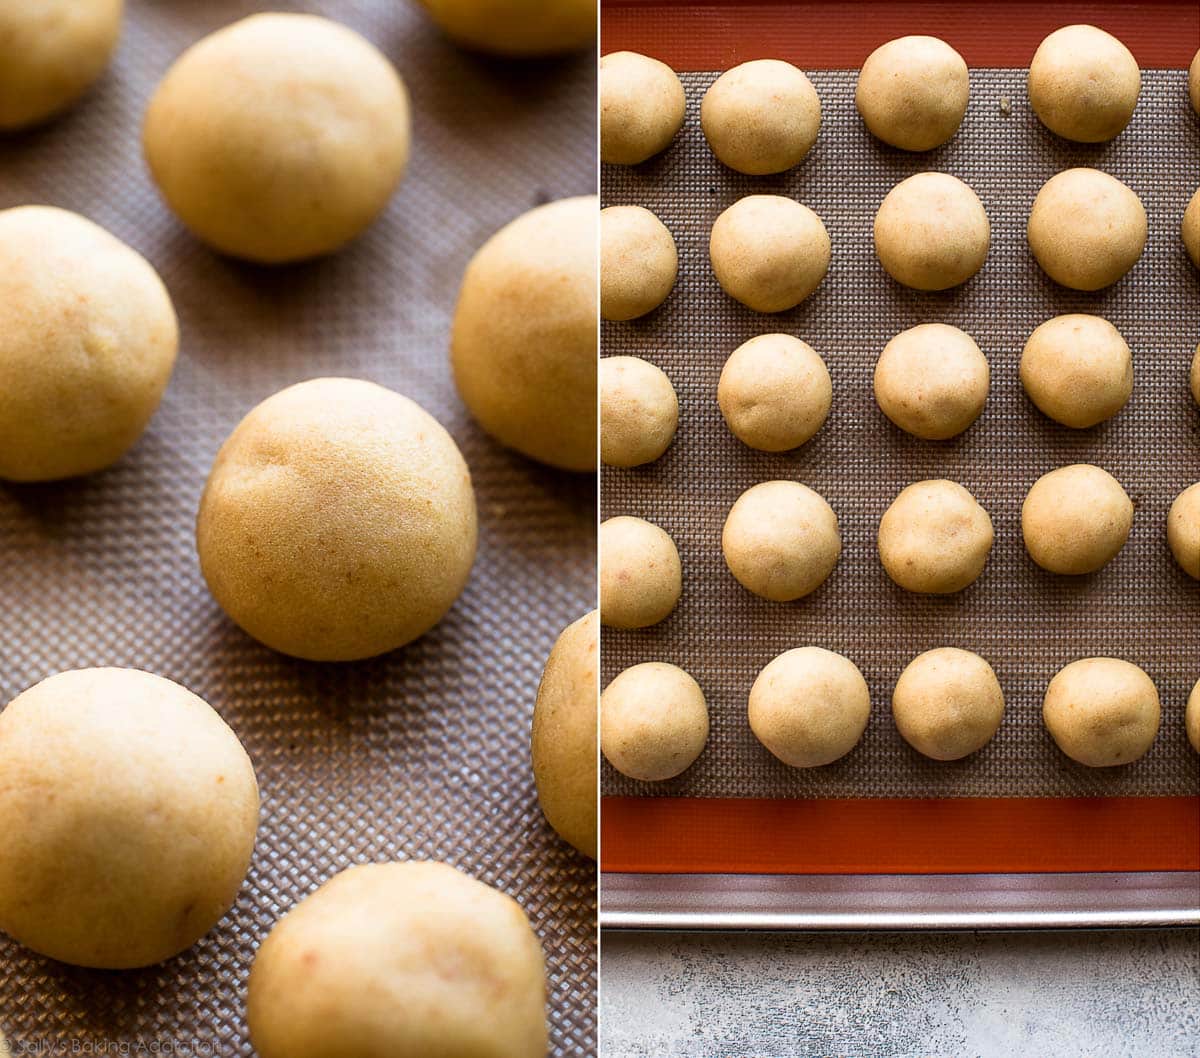
One time the 2 are mixed together, information technology's fourth dimension to roll the mixture into assurance. And here's my flim-flam for doing and so.
My Rolling Trick
It'due south easier to ringlet the cake + frosting mixture into perfectly circular balls if it's common cold. And what I practise is roll the balls upwardly right after the 2 are mixed together. They're pretty misshapen because the cake + frosting mixture is super moist– and at room temperature. So then I chill the balls in the fridge for at to the lowest degree 2 hours. After that, I give them another lilliputian roll to smooth out the sides. When they're cold, they're easier to smooth out and class perfectly circular shapes.
And then (1) roll (2) chill (3) roll over again to smooth out the sides.
The cake balls need to exist super chilled before dipping, and so this trick gets both steps washed!
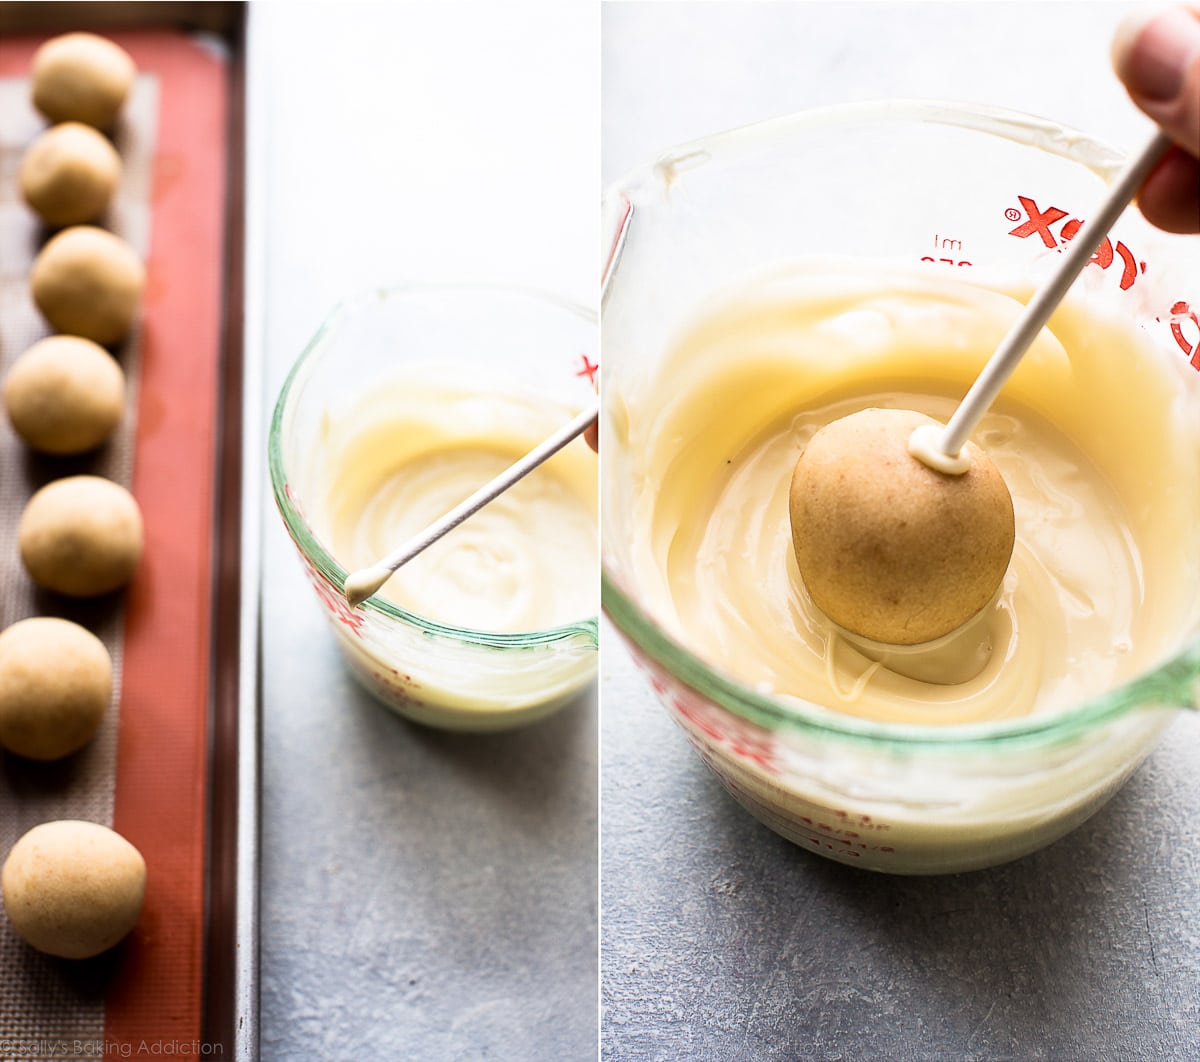
Now let'south dunk. You can dip the cake balls into pure white chocolate, which is what I adopt for best gustation, but that stuff is pretty expensive. And you demand a expert corporeality for all 40 block pops! You can use candy melts/processed blanket instead. I give both options in the recipe beneath forth with notes for each pick.
Another flim-flam: to ensure the block ball stays secure on the lollipop stick, dip it slightly into the blanket get-go. Then stick in the middle of the cake ball. See photo above!
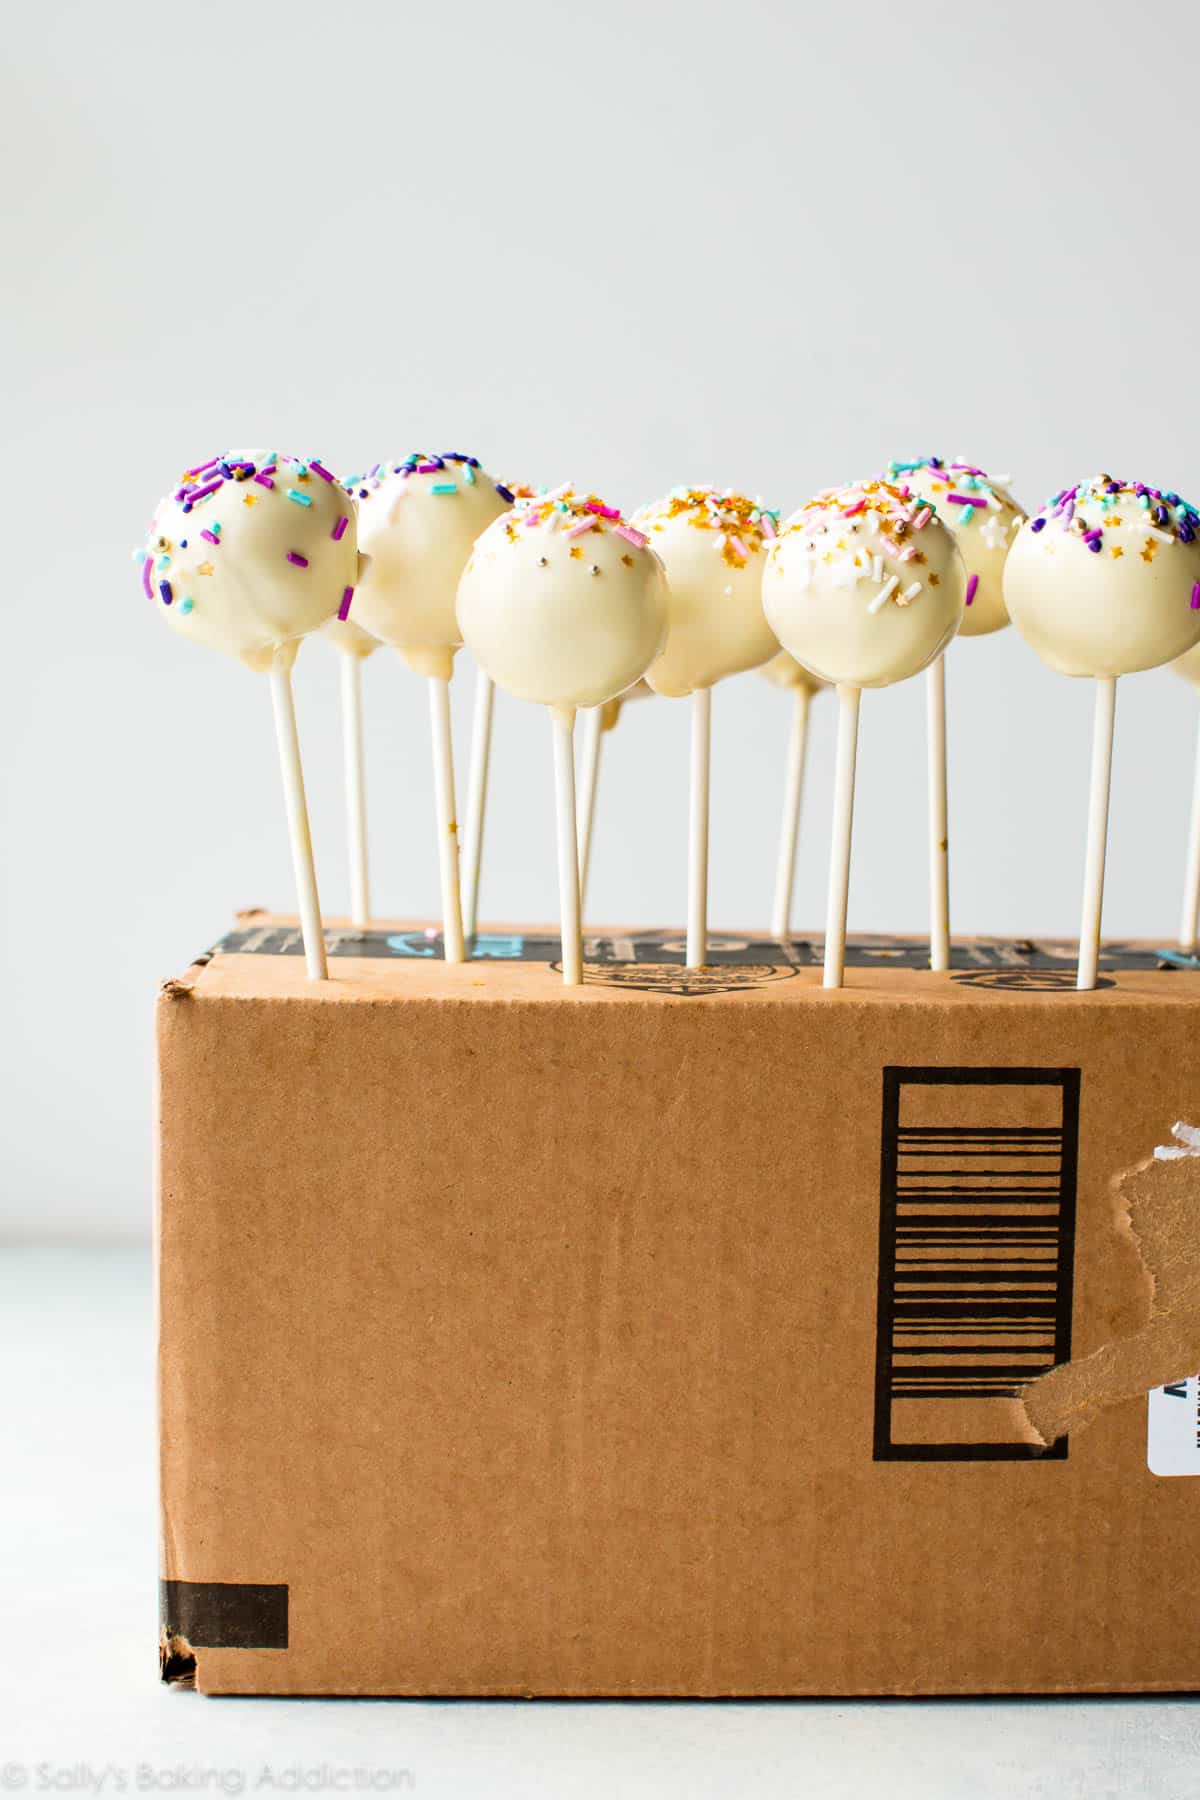
And another trick: the best manner to permit the coating to dry and set– without ruining the perfectly round cake popular– is to place them right side up in a big styrofoam block or even a box. I used a box, as pictured below, for this batch. I just poked super tiny holes into it. Easy and cheap.
Cake pops volition be dry out inside an hr or so.
Cake pops are a genius celebration-worthy care for to make ahead of time considering they freeze beautifully. I simply freeze them in a large zipped-top freezer bag after they've fully dried. They're bully for upwardly to 6 weeks, then just let them thaw overnight in the fridge.
I have a few more tips for ya! I went over these in Sally'south Processed Habit because they're pretty of import to review before you get started.
Block Pop Tips
- Frosting is the best office of cake, right? Well that doesn't employ to cake pops. Too much frosting produces a super moisture and greasy cake pop– not the deliciously moist pop yous were expecting. This frosting recipe yields *just enough* to barely moisten those cake crumbs. Proper ratio is imperative here!
- The block assurance need to be extremely cold earlier dipping. Brand sure you accept plenty room in your refrigerator or freezer for them. I always arctic them on a large lined baking canvas.
- A 2-cup glass liquid measuring loving cup is the perfect depth for dipping the cake pops.
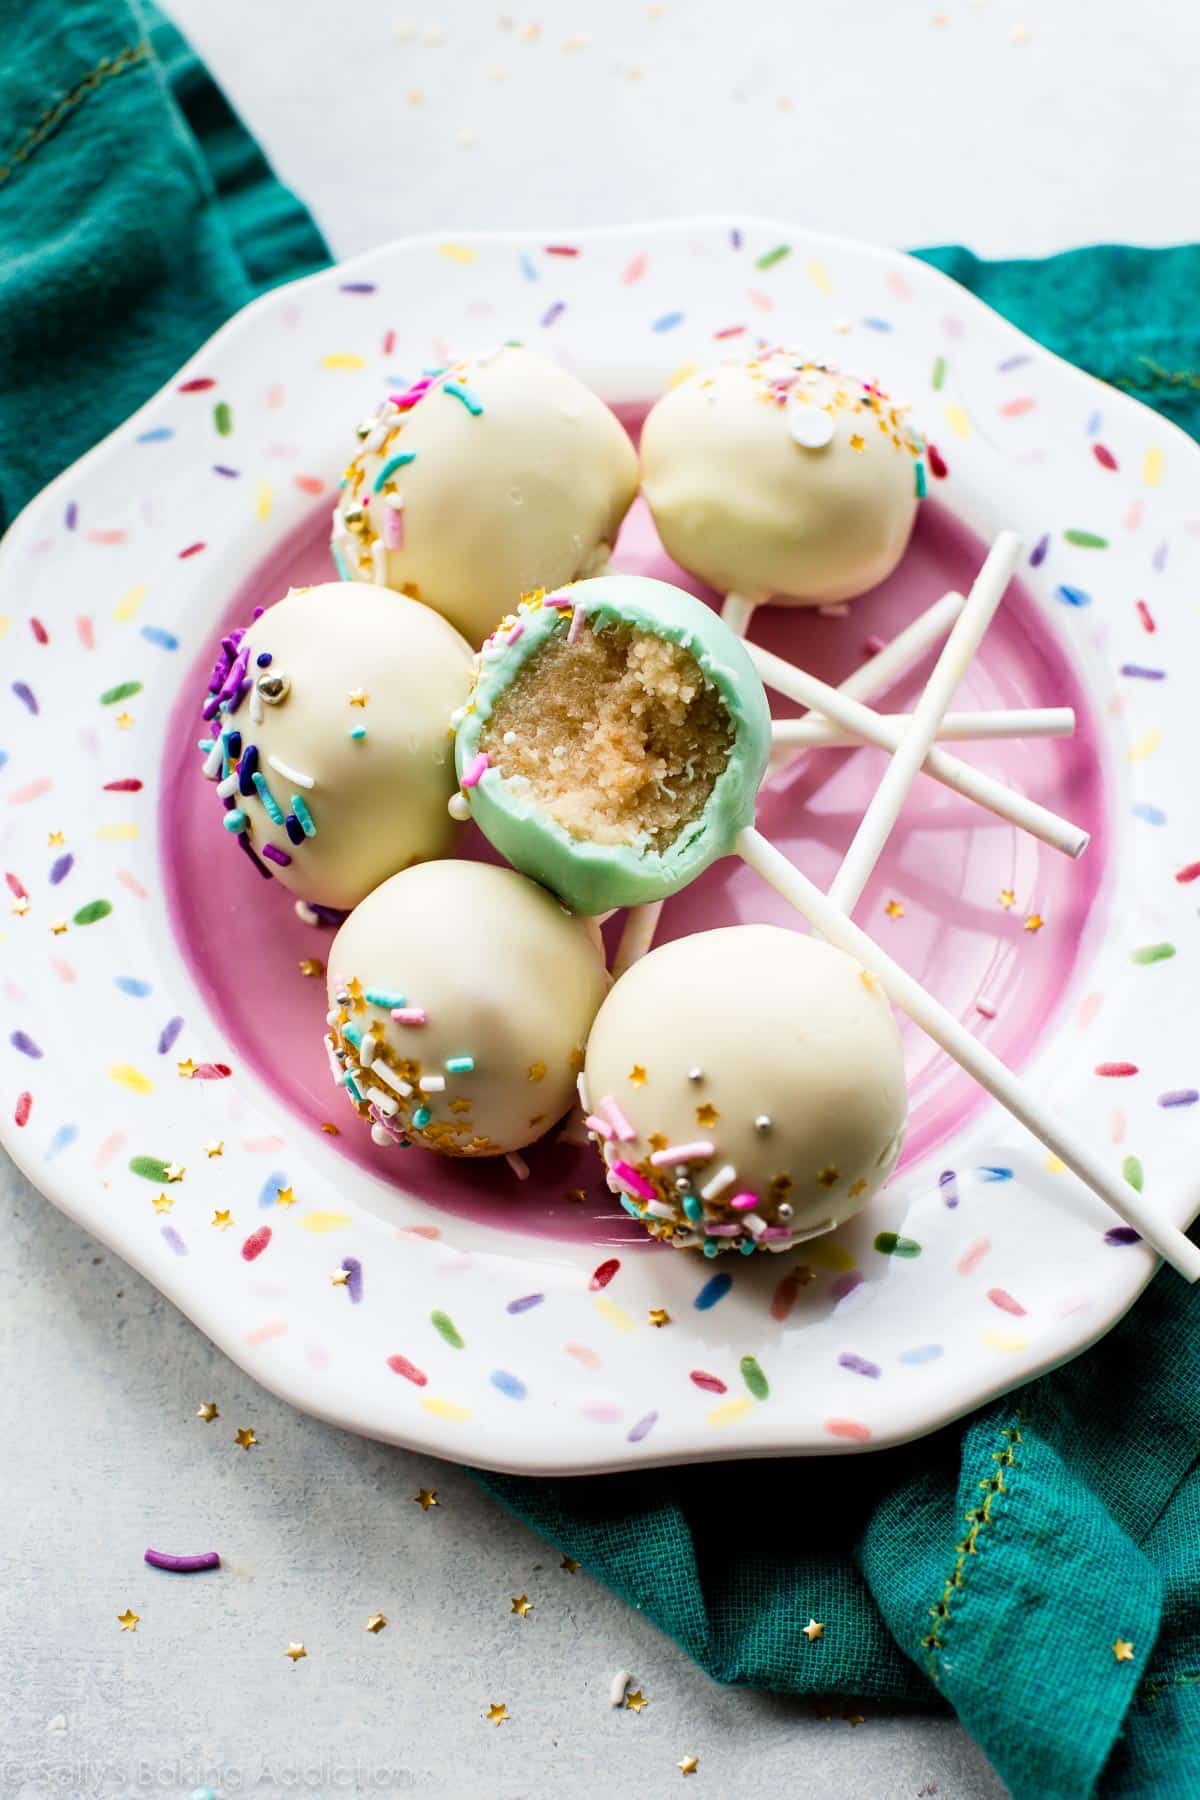
- Tinting the coating brings a fun POP of color! I ordinarily stick to just white + ane other color. Or two colors maximum. The teal color I employ here is Americolor gel food coloring in teal.
- Sprinkles are necessary, of form. But you already knew that.
Also lollipop sticks and the correct size cake pan, you don't actually need much else to get going!
Impress
Description
Homemade vanilla cake pops with vanilla buttercream from scratch- no cake mix or canned frosting!
- 1 and 2/3 cups (209g) all-purpose flour (spoon & leveled)
- 1/2 teaspoon baking powder
- ane/four teaspoon baking soda
- 1/2 teaspoon salt
- 1/two cup (115g; 1 stick) unsalted butter, softened to room temperature
- 1 cup (200g) granulated sugar
- ane large egg, at room temperature
- 2 teaspoons pure vanilla excerpt
- ane cup (240ml) whole milk (or buttermilk)
Frosting
- 7 Tablespoons (100g) unsalted butter, softened to room temperature
- i and 3/4 cups (210g) confectioners' carbohydrate
- 2–3 teaspoons heavy cream or milk
- 1 teaspoon pure vanilla extract
Blanket
- 40 ounces candy melts or coating (or pure white chocolate)*
- sprinkles
- Preheat oven to 350°F (177°C). Grease a 9-inch springform pan.
- Brand the block: Whisk the flour, blistering powder, baking soda, and common salt together in a medium bowl. Set aside. Using a handheld or stand mixer fitted with a paddle or whisk zipper, beat the butter and sugar together in a large basin until creamed, near 2 minutes. Add the egg and vanilla extract and beat out on high speed until combined. Scrape downwardly the lesser and sides of the bowl as needed.
- With the mixer running on depression speed, add the dry out ingredients and milk to the moisture ingredients until combined. Manually whisk the batter to ensure there are no large lumps at the bottom of the bowl. Batter will be slightly thick. Pour the batter evenly into the prepared pan. Bake for 30-36 minutes or until a toothpick inserted in the heart comes out clean. If the pinnacle begins browning besides chop-chop in the oven, loosely place a piece of aluminum foil on top.
- All the cake to absurd completely in the pan attack a wire rack.
- Brand the frosting:With a handheld or stand up mixer fitted with a paddle attachment, beat the butter on medium speed until creamy, nigh two minutes. Add confectioners' sugar, heavy cream, and vanilla extract with the mixer running on depression. Increase to high speed and beat for 3 full minutes.
- Crumble the cooled cake into the basin on top of the frosting. Brand certain there are no large lumps. Turn the mixer on depression and beat the frosting and cake crumbles together until combined.
- Measure 1 Tablespoon of moist cake mixture and roll into a ball. Place balls on a lined baking canvass. Refrigerate for 2 hours or freeze for one hour. Re-roll the chilled balls to smoothen out, if needed. Place dorsum into the fridge as yous'll only work with a couple at a time.
- Melt the blanket in a ii-cup liquid measuring cup (best for dunking!). you tin can use a double boiler or microwave.
- Coat the cake assurance: Remove only ii-iii cake balls from the refrigerator at a fourth dimension. Dip a lollipop stick about i/ii inch into the blanket, so insert into the center or the block ball. Only button information technology about halfway through the cake ball. Dip the cake ball into the blanket until it is completely covered. Brand certain the coating covers the base of operations of the cake ball where it meets the lollipop stick. Very gently tap the stick confronting the edge of the measuring loving cup to permit excess coating to drop off. Decorate the top with sprinkles and place upright into a styrofoam block or box (every bit explained higher up). Echo with remaining cake balls, only working with some out of the refrigerator at a time. The cake assurance must be very cold when dipping!
- Coating will set within an hour. Store cake pops in the refrigerator for upward to one week.
Notes
- Make Ahead Instructions: I ever make the cake 1 24-hour interval ahead of time. Embrace and keep at room temperature. You can store the undipped cake assurance in the refrigerator for upward to 2 days or freeze them for up to six weeks. Let to thaw in the refrigerator then proceed with step 9. You tin can also freeze the finished cake pops for up to 6 weeks once the coating has fully set. Thaw overnight in the refrigerator.
- Special Tools: KitchenAid Stand Mixer | KitchenAid Hand Mixer | Drinking glass Measuring Cup | Springform Pan | Silpat Baking Mat | Half Canvass Blistering Pan | Lollipop Sticks | Americolor Food Coloring
- Blanket: You lot tin use candy coating/candy melts, almond bark, or pure white chocolate. If using almond bark or pure white chocolate, chop it up before melting. Melt it down with i/2 teaspoon vegetable oil to thin out and so it's easier to use equally a coating. Semi-sweet, bittersweet, or milk chocolate work also. Coarsely chop and melt downward with i/ii teaspoon vegetable oil to sparse out. Keep warm over a double boiler.
Keywords: cake pops
Subscribe
Blistering Fabricated Easy
Are you new to this website? This email serial is a bang-up place to starting time. I'll walk you through a few of my well-nigh popular recipes and show you exactly why they work.
Source: https://sallysbakingaddiction.com/homemade-cake-pops/
Posted by: rhoadescorties.blogspot.com
0 Response to "How To Bake Using The Cake Pop Mold"
Post a Comment